
WireGuard is an opensource VPN protocol The goal of this post is to document the process of setting up a WireGuard server on a Kali virtual machine (VM). This will be sandboxed in the VM in order to make sure that in the process of this setup, there are no accidents that could affect critical machine functions (this is a best practice). In addition, these screenshots will occasionally contain typos, as this is the documentation of a live process.
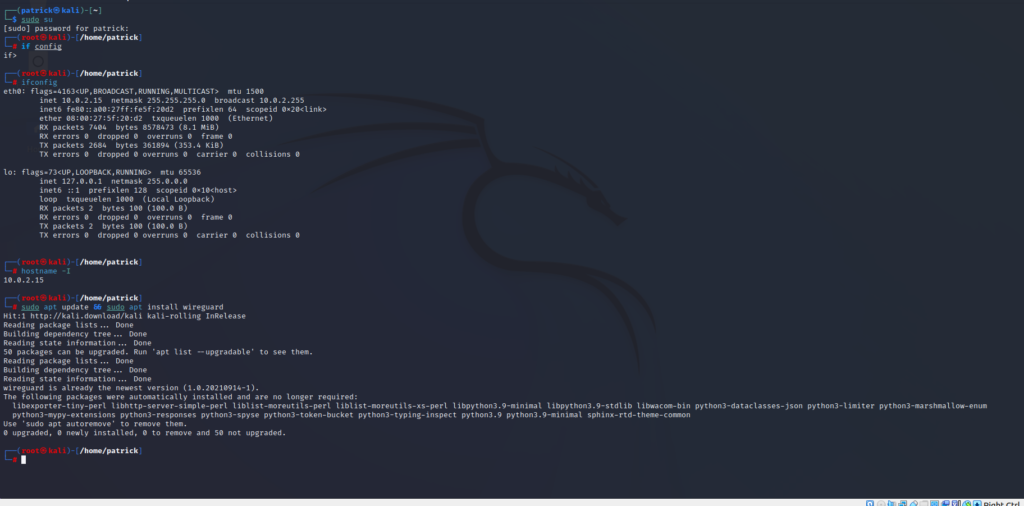
The top half of this screen is us looking up our network information-mainly, our IP address. It can be looked up through either the “ifconfig” or “hostname -I” command. After we have that, we run an update (to make sure everything is as current as possible) and install the WireGuard VPN.

Next, we are going to generate some keys. Before that, however, we will run the “umask 077” command. We are going to be creating some files, so it is important to set up the permissions for them. “077” takes away the “group/others” permissions for this session. On the next line, we generate our private key using the “wg” command, and immediately write it to the “server.key” folder (while simultaneously creating that folder). On the next line, we generate the public key by reading the private key through the “pubkey” function. That output is then written to the file “server.pub”, which we created similar to the “server.key” file before it.

(NOTE: the original screenshot was somehow deleted. This is an attempted recreation of it. The creation of the “wg0.conf” file happened off-screen.)
We can see that we have the three ingredients we need- the configuration file, and the two keys (private and public). The configuration file is empty, so we need to add the configurations to it. This was done through the “vim” command.
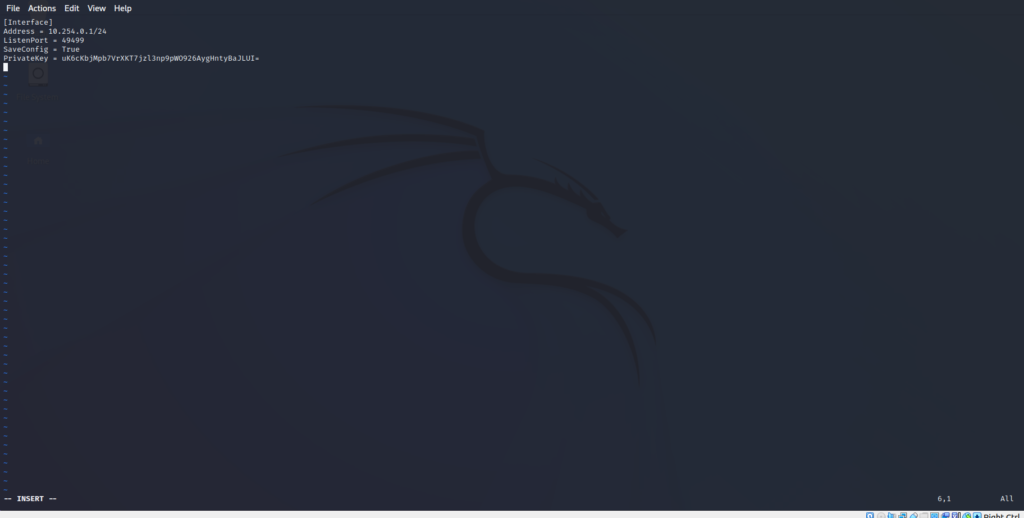
Our file contains four lines of information. We are setting up the interface to run on local IP’s. Any IP address in the private range works. The port number is a random one I picked in the private port range. Finally, we insert our private key (it is the same as the one shown before). Now it’s time to start the server!

The first line creates an interface using our recently written “wg0.conf” file. Our second input uses the “systemctl” command to enable WireGuard and allow it to run. So, lets check to see if its running.
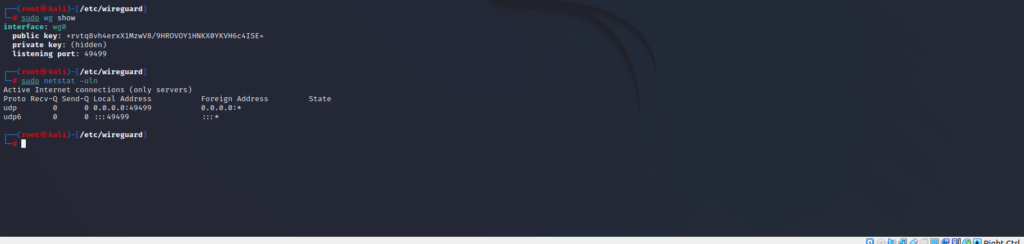
Success! We can see it is indeed up and running, with our public key (visible), private key (invisible), and listening port all matching what we used earlier. The “netstat” command shows us that WireGuard is currently listening for connections. Let’s make sure that our creation has some protection, in the form of a firewall.
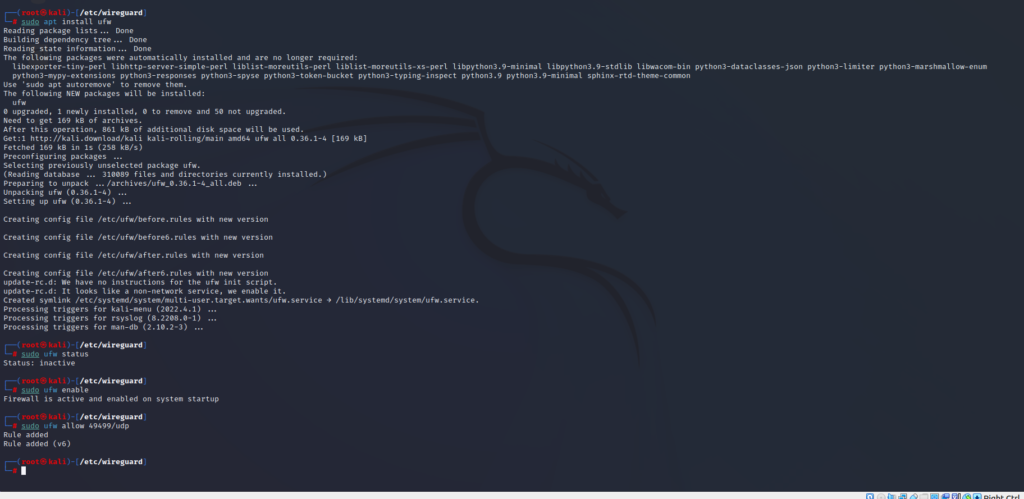
We have installed the “ufw” firewall for protection. It was not enabled upon installation, so we have enabled it. Finally, we will create a rule that allows traffic through our port (49499). We have successfully installed and set up a WireGuard VPN server!